Record a session
Recording is the core of Matcha. The app calibrates on the stumps, then detects each delivery automatically and prepares clips for analysis.
Quick visual guide
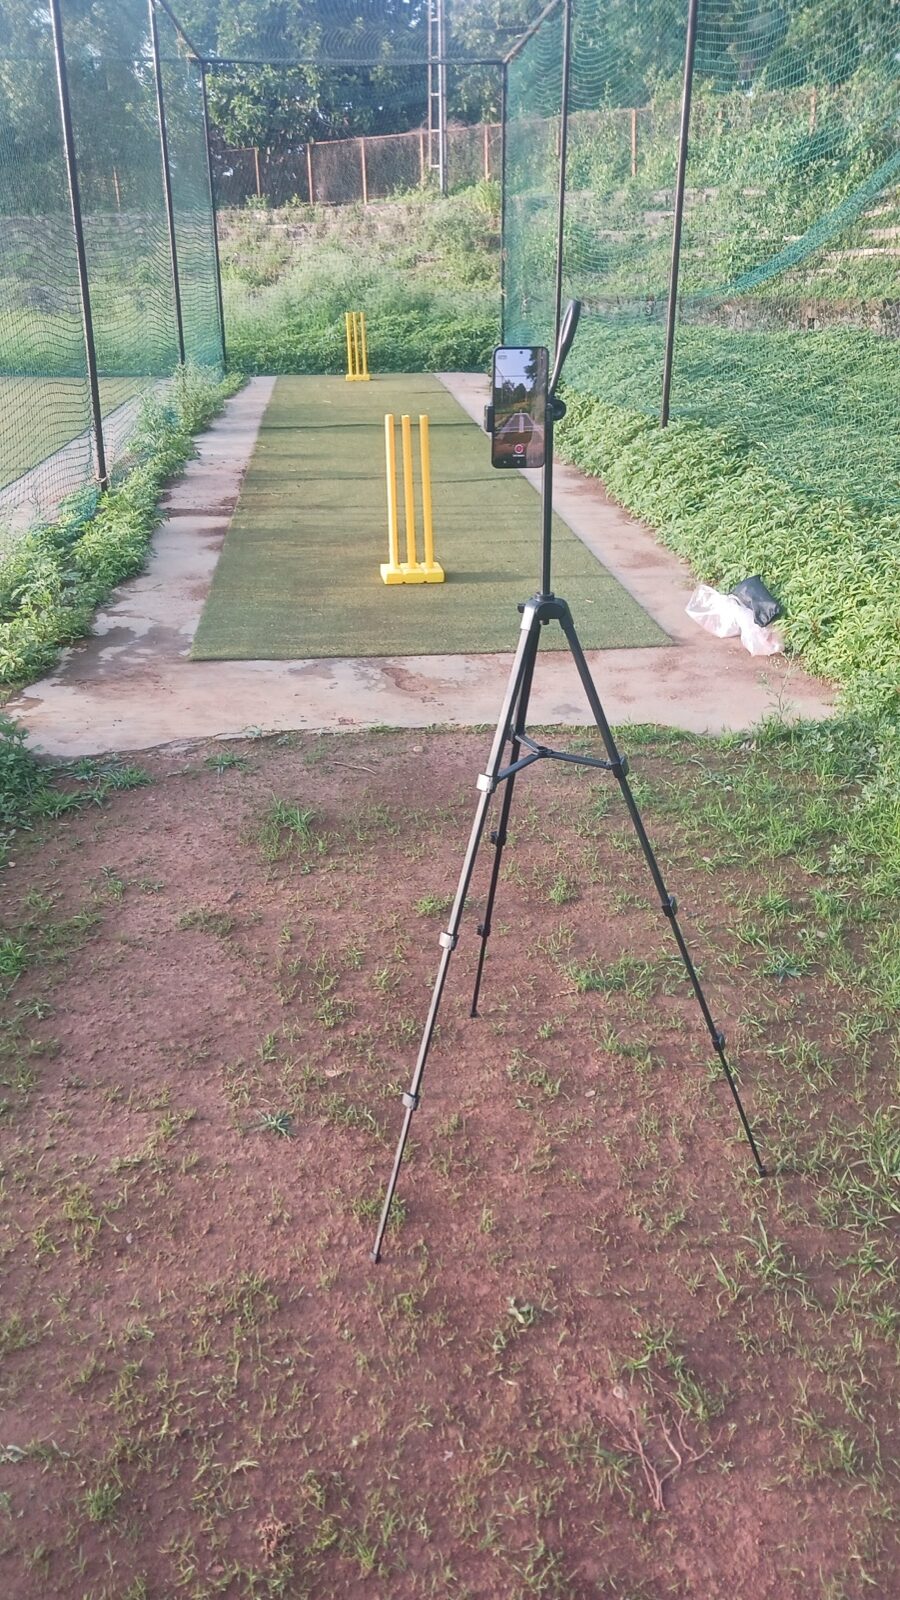
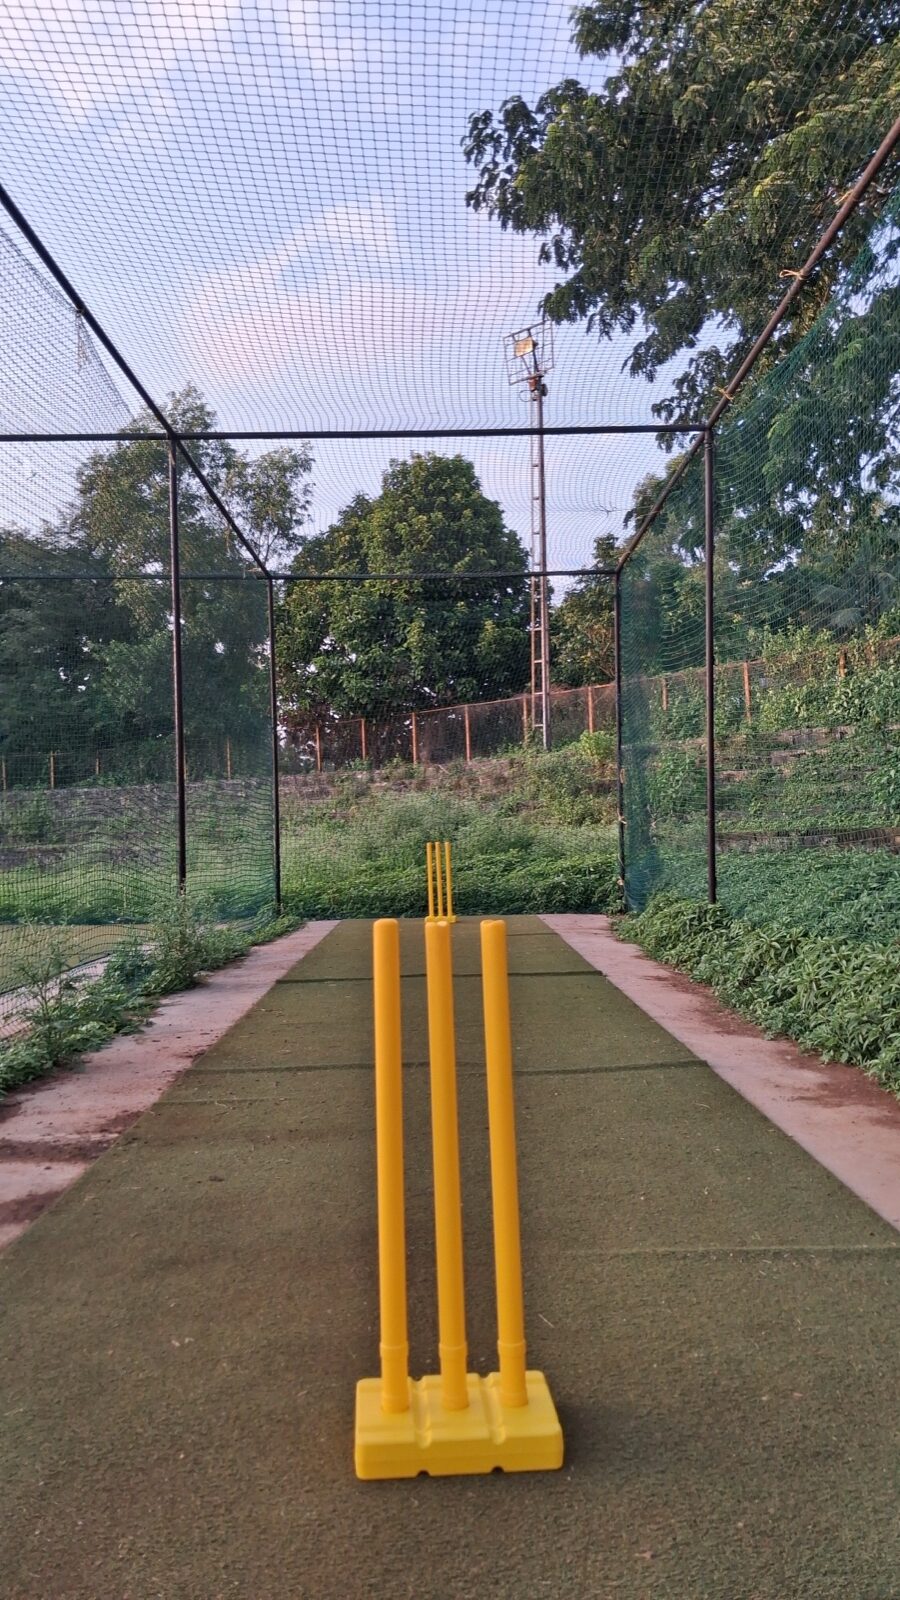
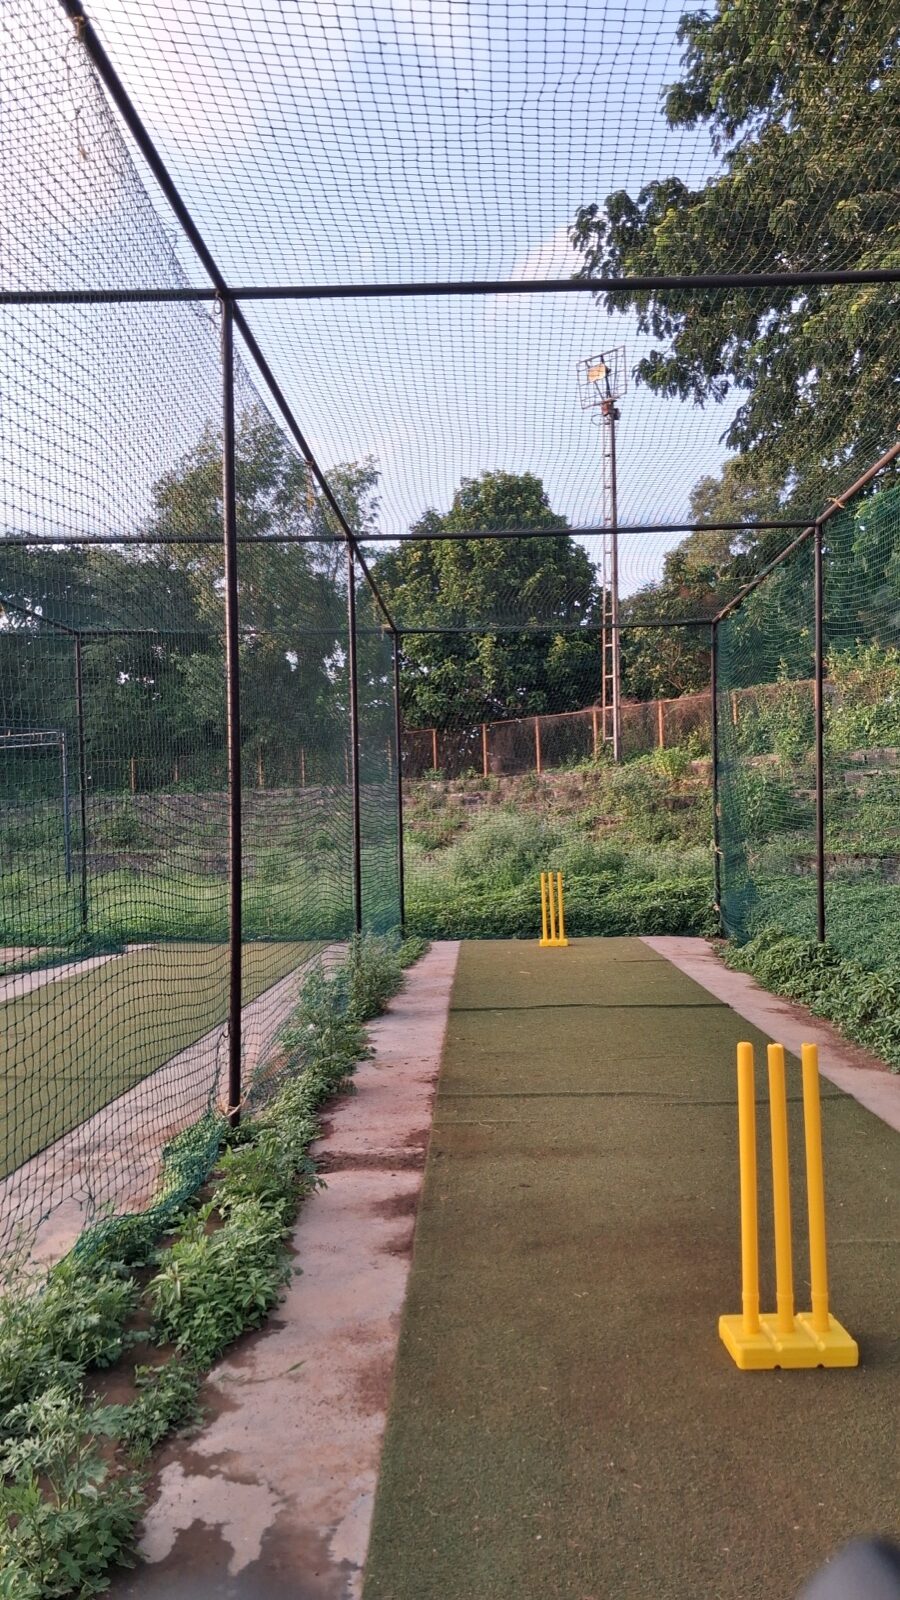
Section titled “Quick visual guide”Use this setup whenever you record in a net: the phone stays fixed behind the non-striker stumps, both sets of stumps stay visible, and the app is allowed to finish calibration before play starts.
Before you record
Section titled “Before you record”- Mount or steady your phone so the stumps and batter are in frame.
- Place the phone behind the non-striker stumps, looking straight down the pitch.
- Make sure you have good light and a stable view down the pitch.
- Clear bags, people, and net poles from the line between the phone and the stumps where possible.
Get the perfect setup in 5 easy steps
Section titled “Get the perfect setup in 5 easy steps”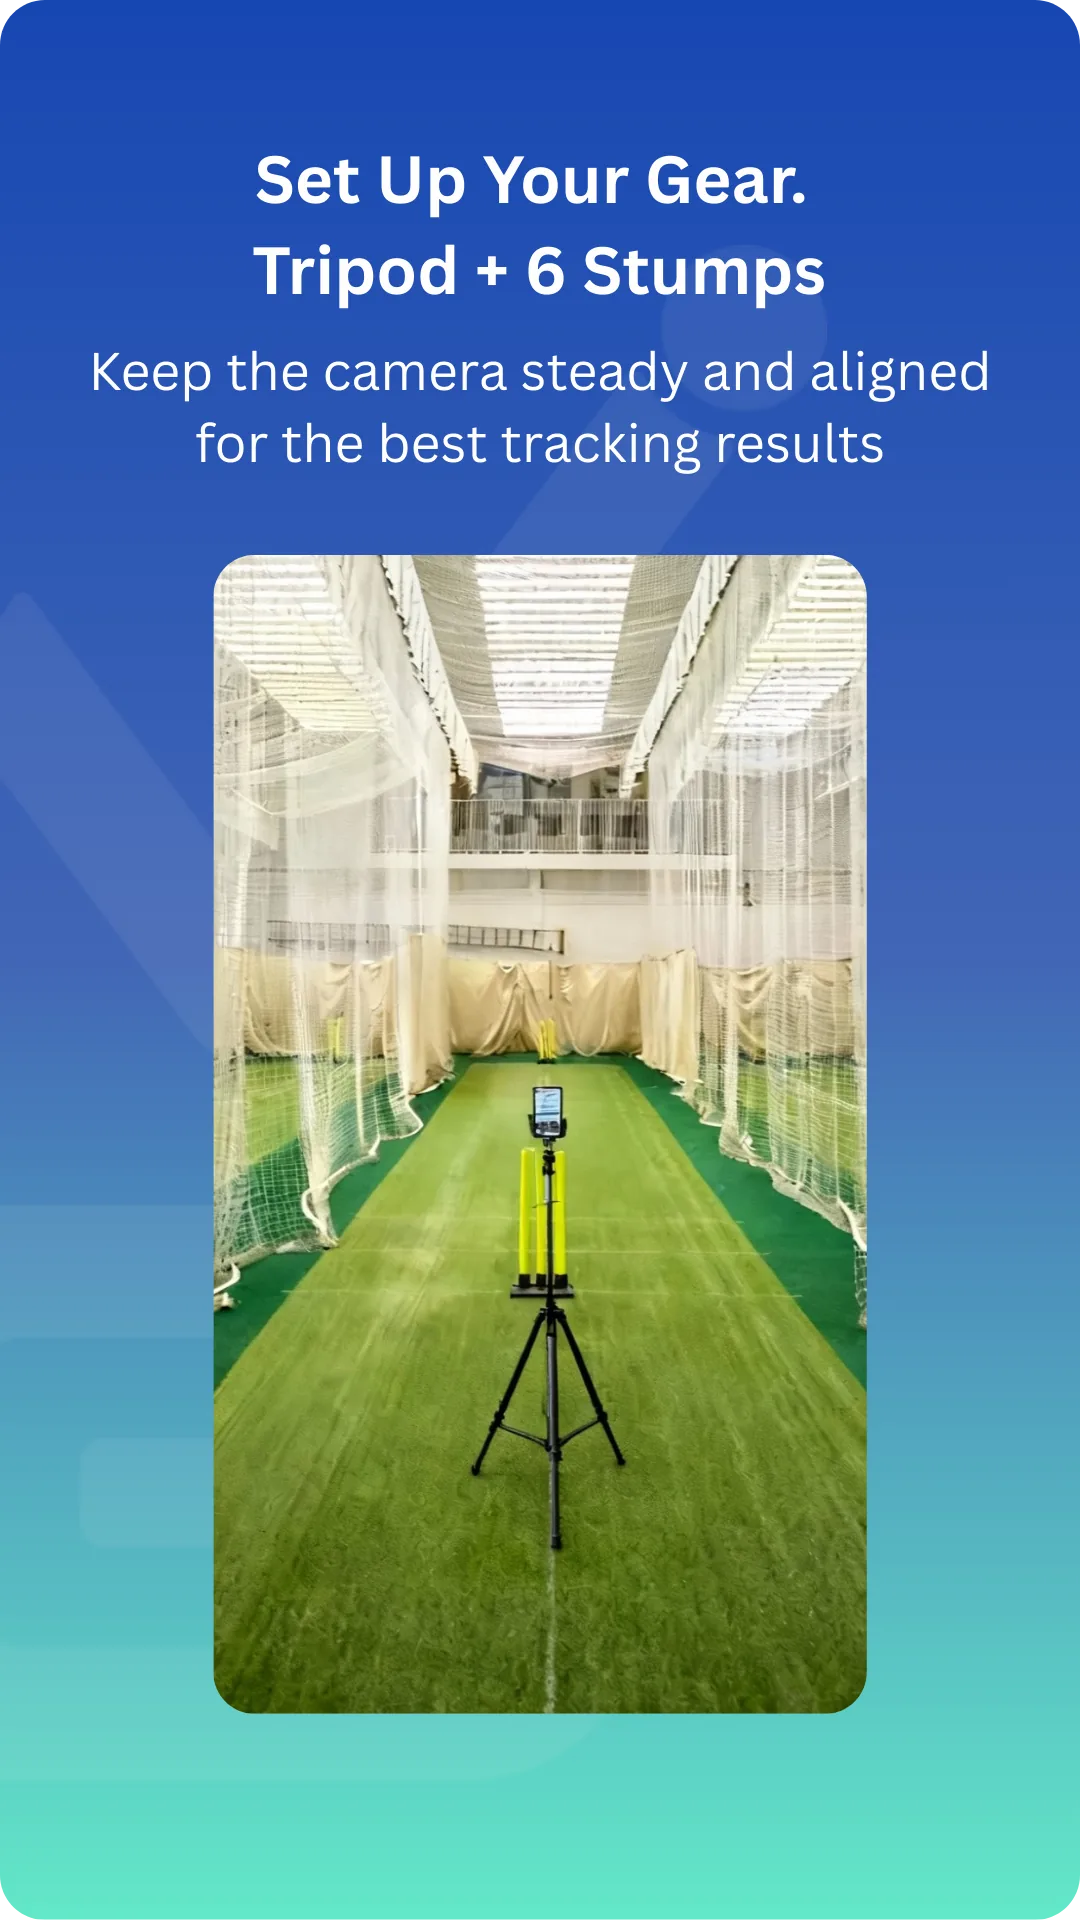
Use a tripod and six stumps. A handheld phone will shake and make tracking unreliable.
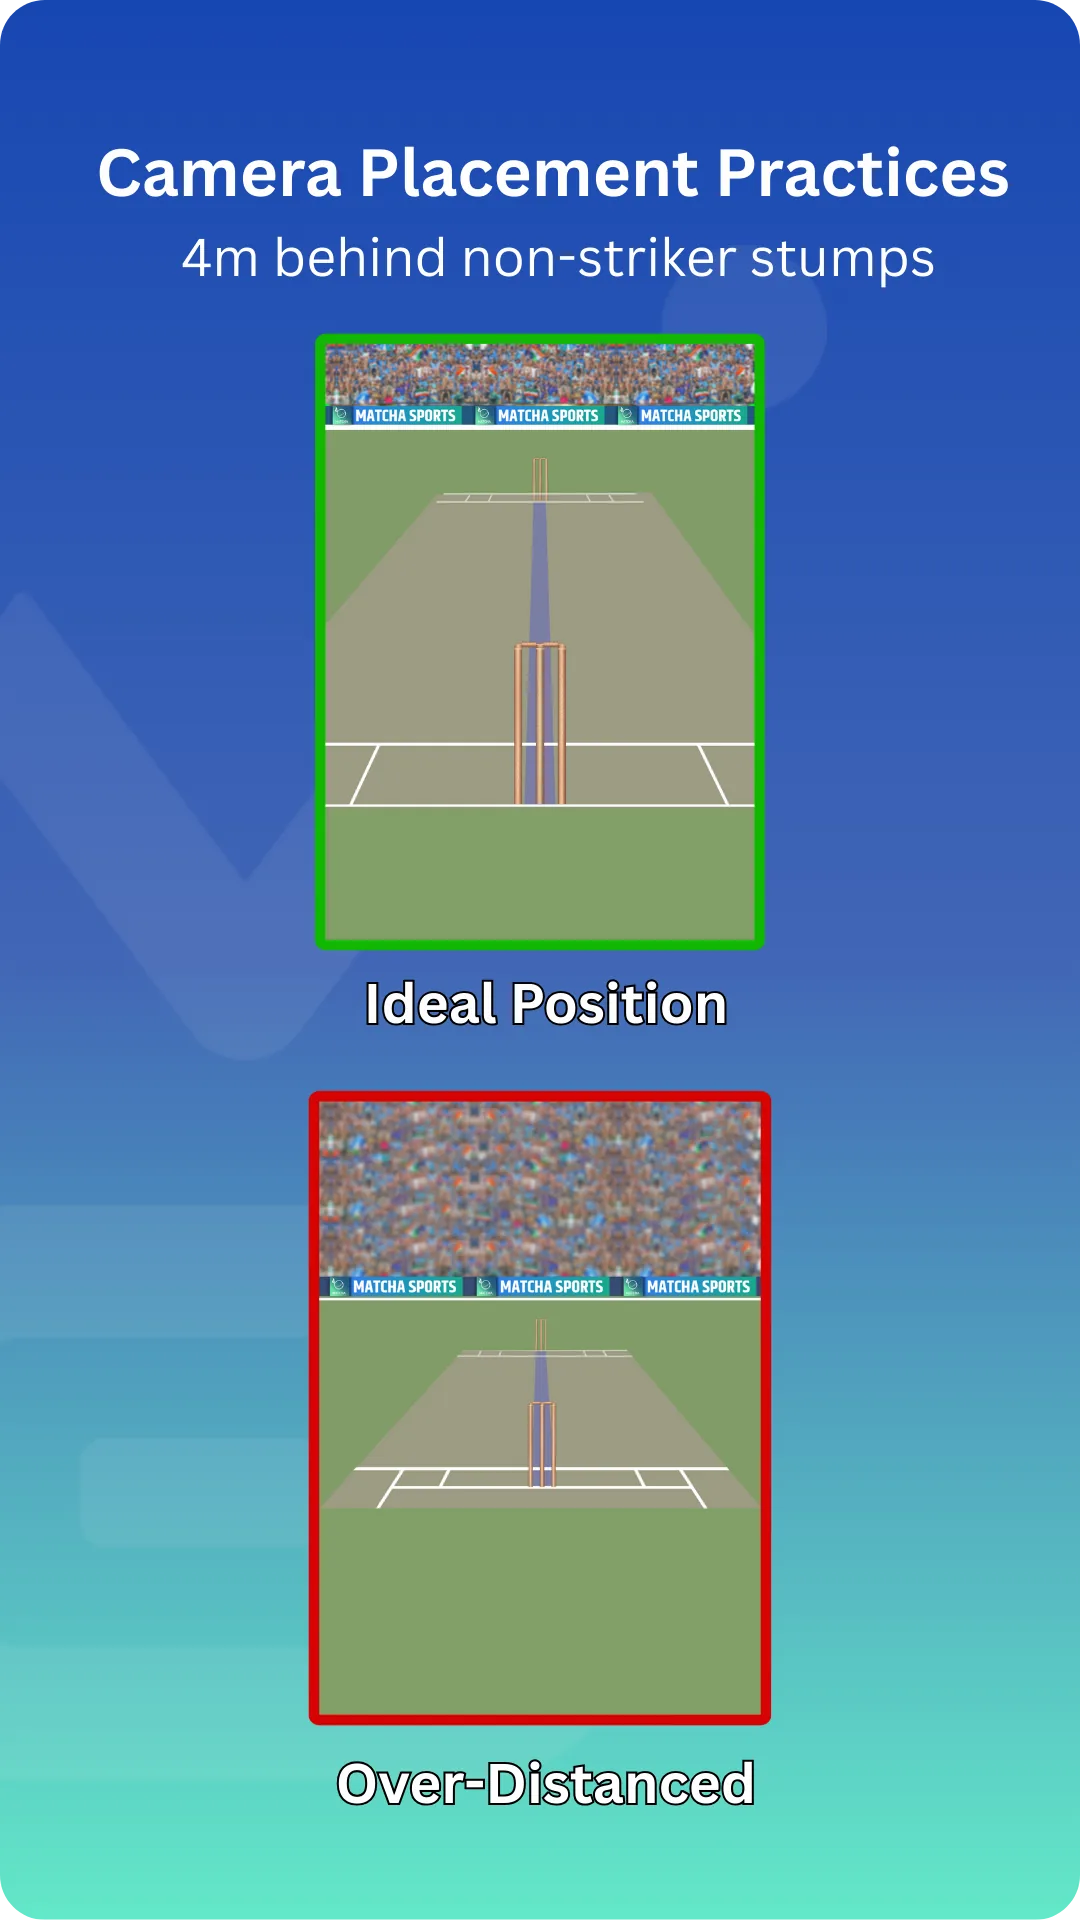
Put the camera behind the non-striker end, close enough that the stumps fill the calibration boxes.
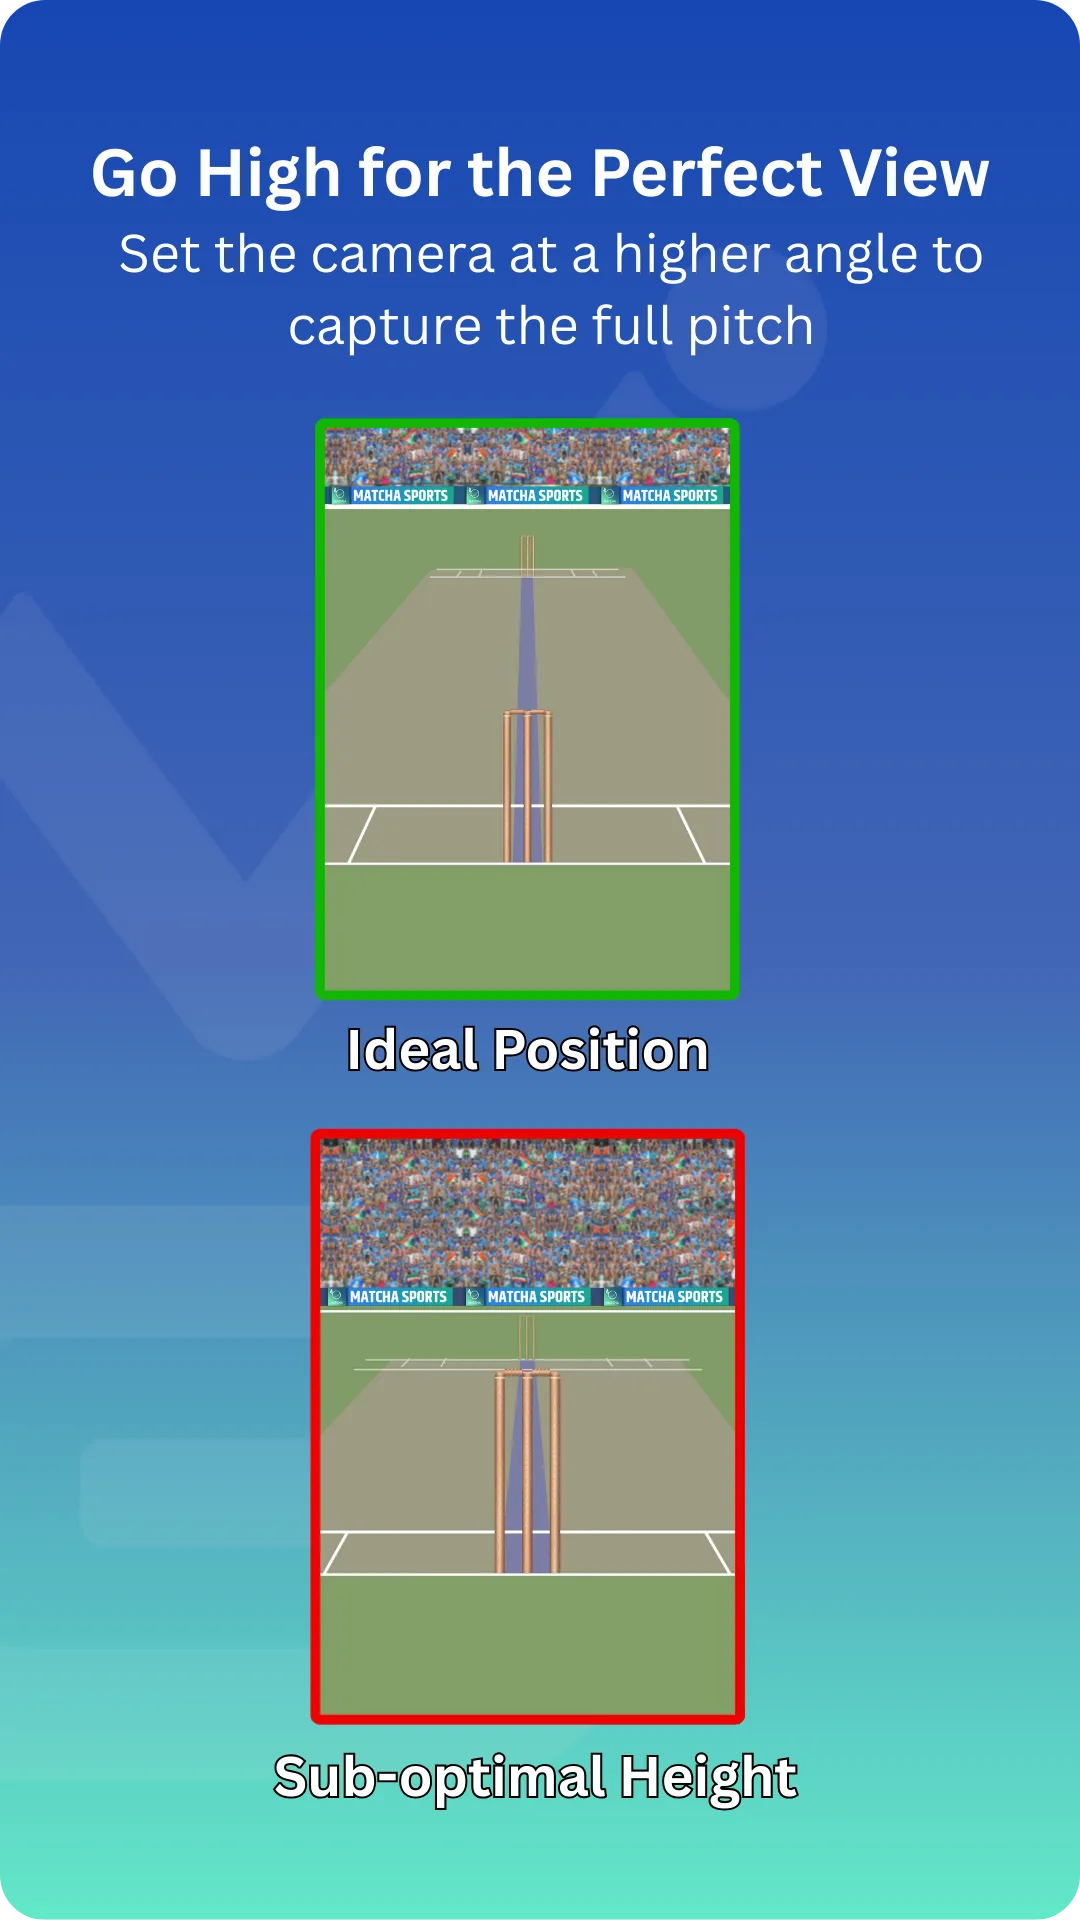
A slightly higher phone angle captures more pitch and gives the app a cleaner view of the ball path.
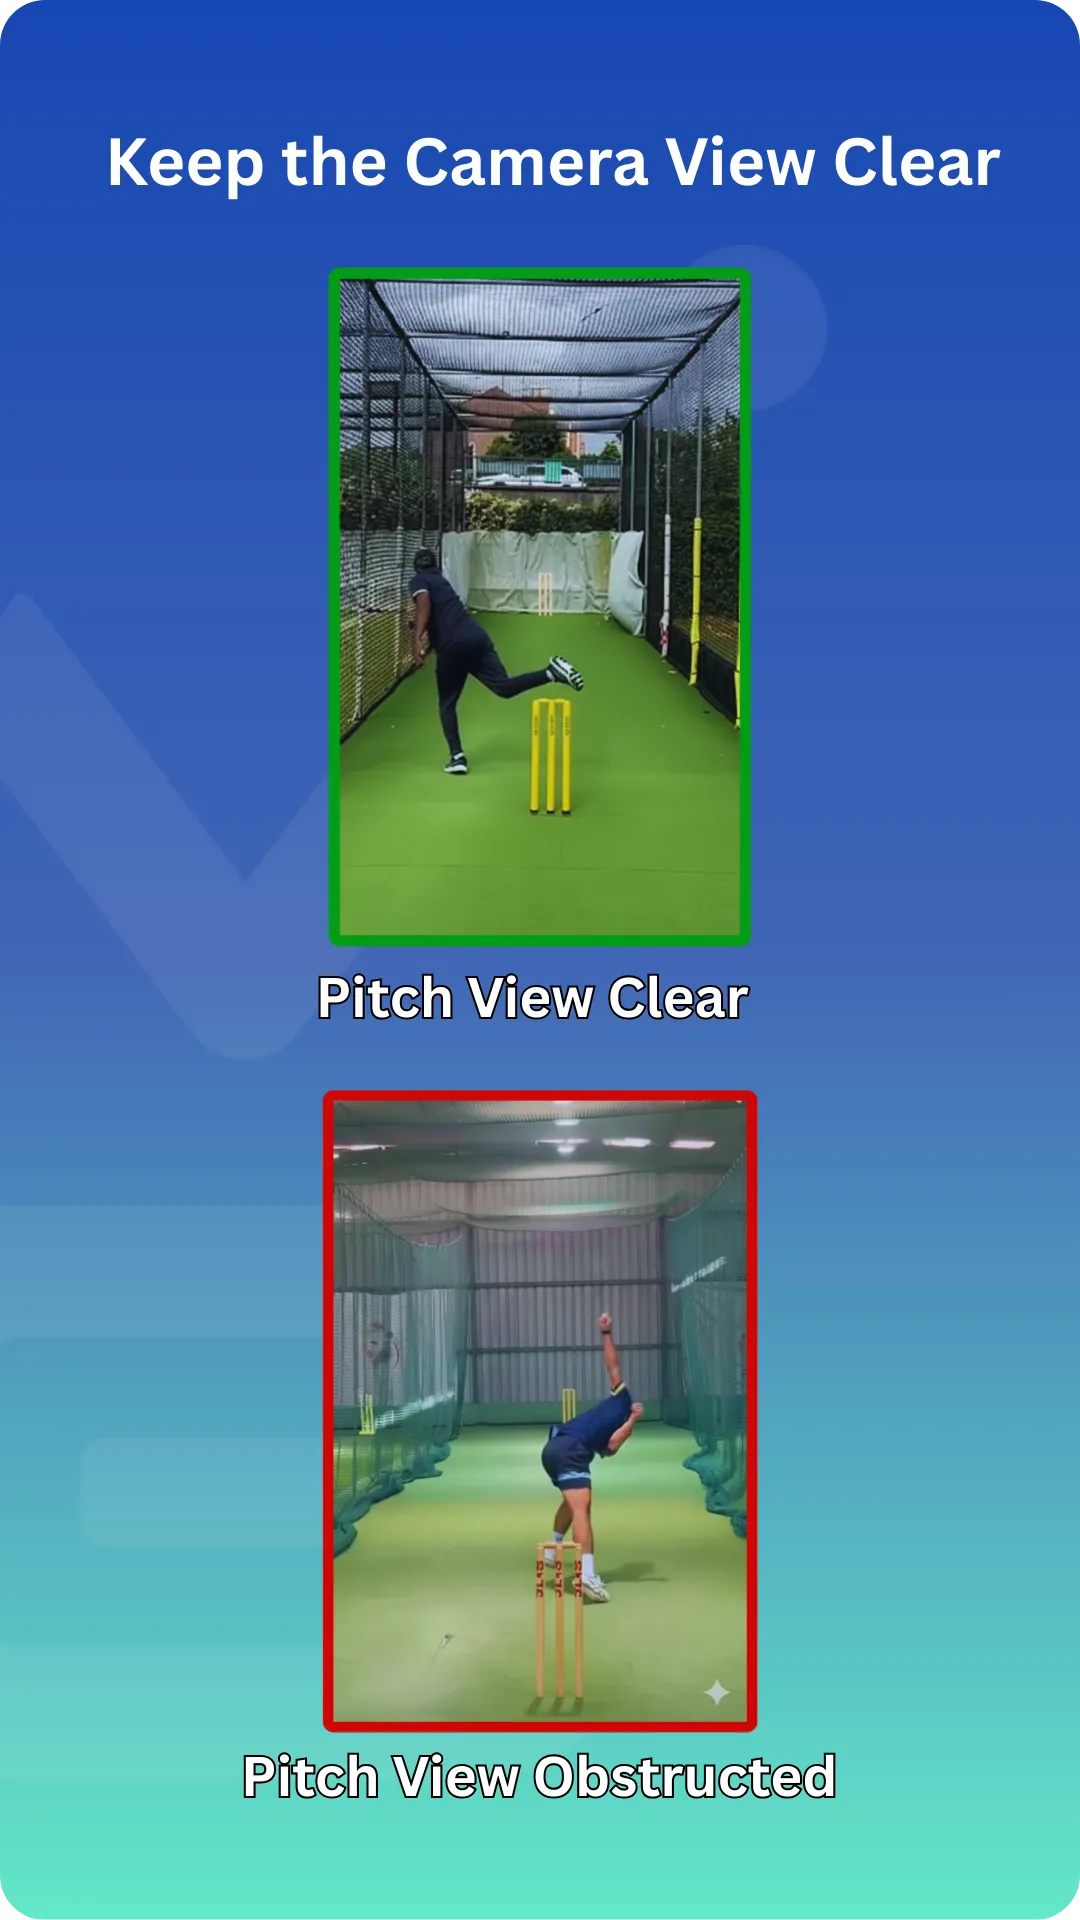
Both stump sets should be visible. Avoid people, kit bags, netting, or poles blocking the pitch.
Tracking improves after a few balls. Keep recording while Matcha prepares the clips and KPIs.
Record
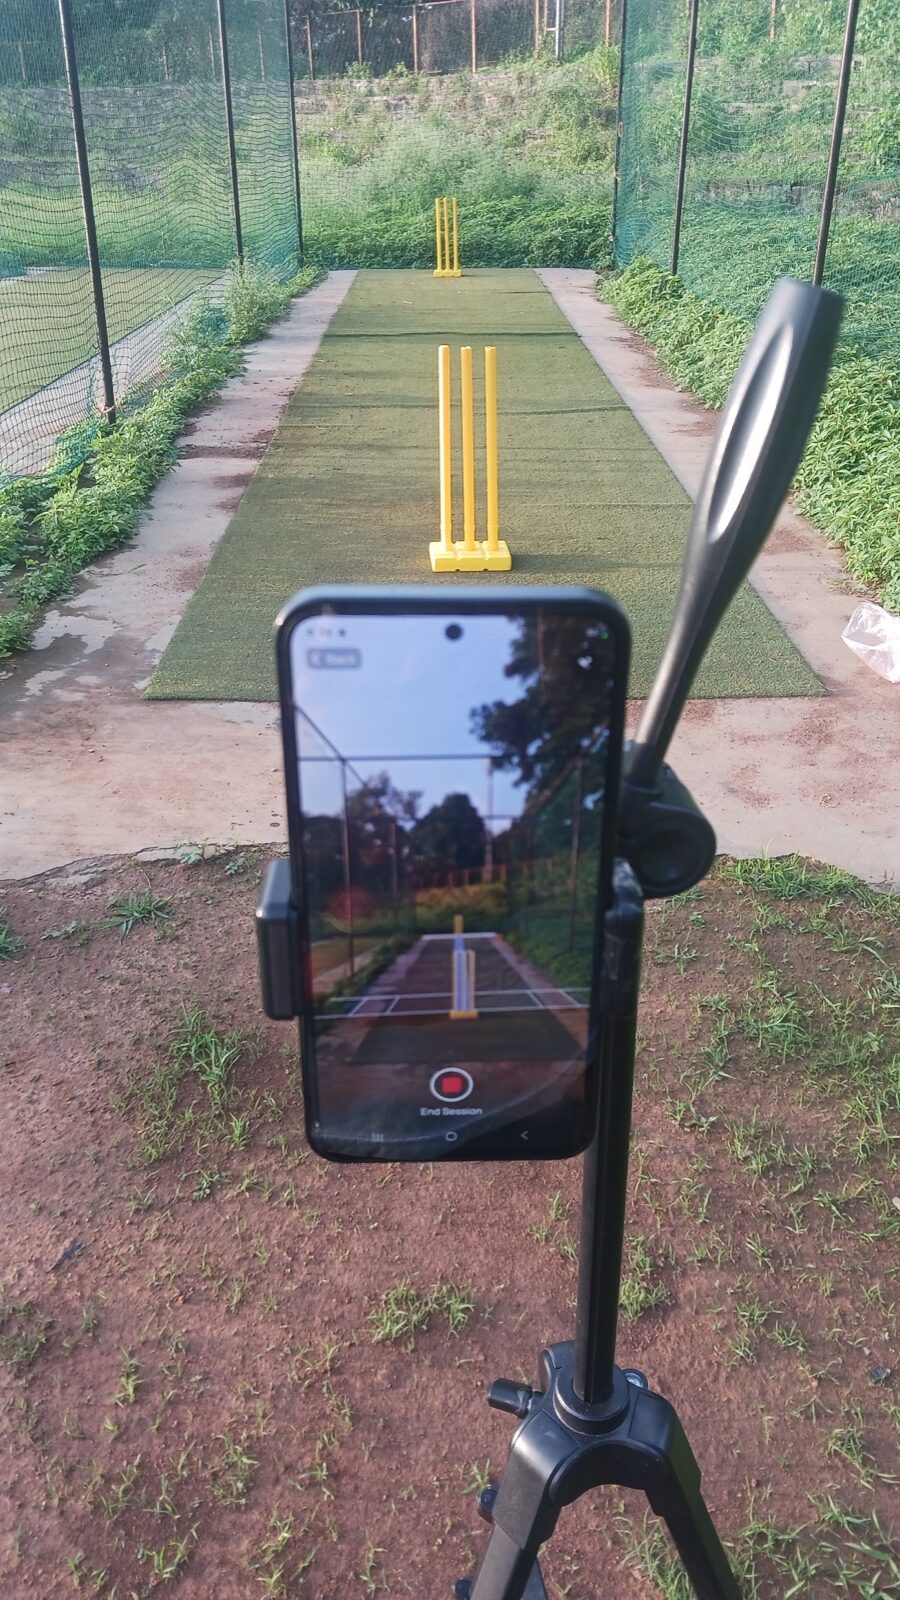
Section titled “Record”- Tap the record button (the centre button on the bottom bar) to start a new session.
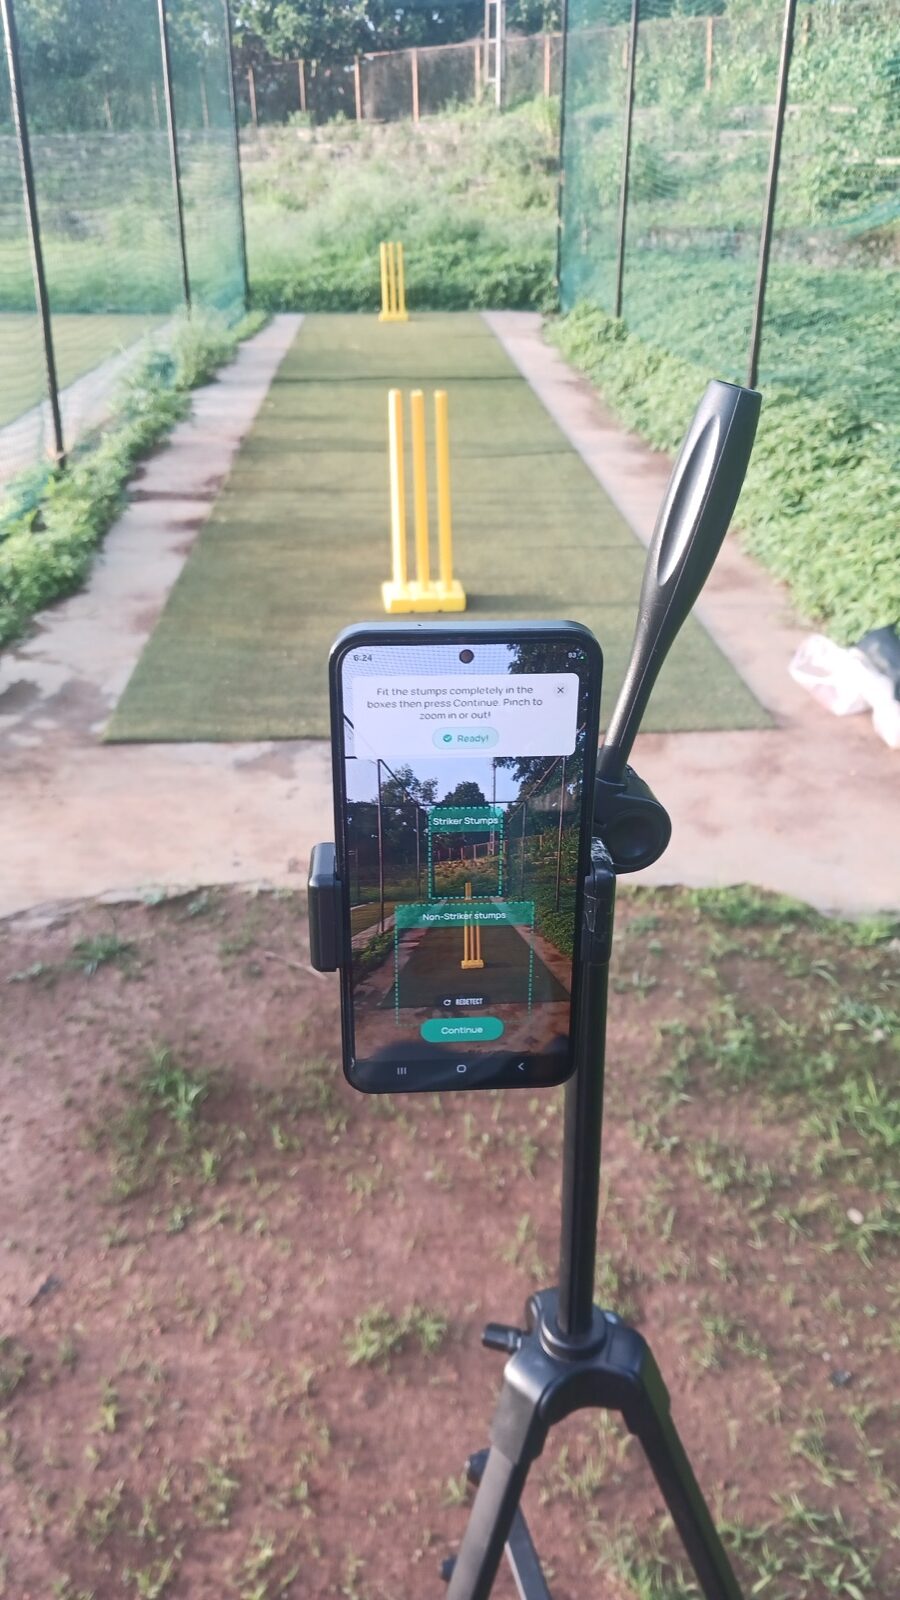
- Calibrate on the stumps. The app needs to find the stumps before it can detect deliveries — follow the on-screen prompt to point the camera at the stumps until calibration succeeds.
- Tap Continue only when the striker and non-striker stumps are fully inside their boxes.
- Record the session. As play happens, the app detects each delivery automatically and marks it.
- Stop when you’re done.
Calibration examples
Section titled “Calibration examples”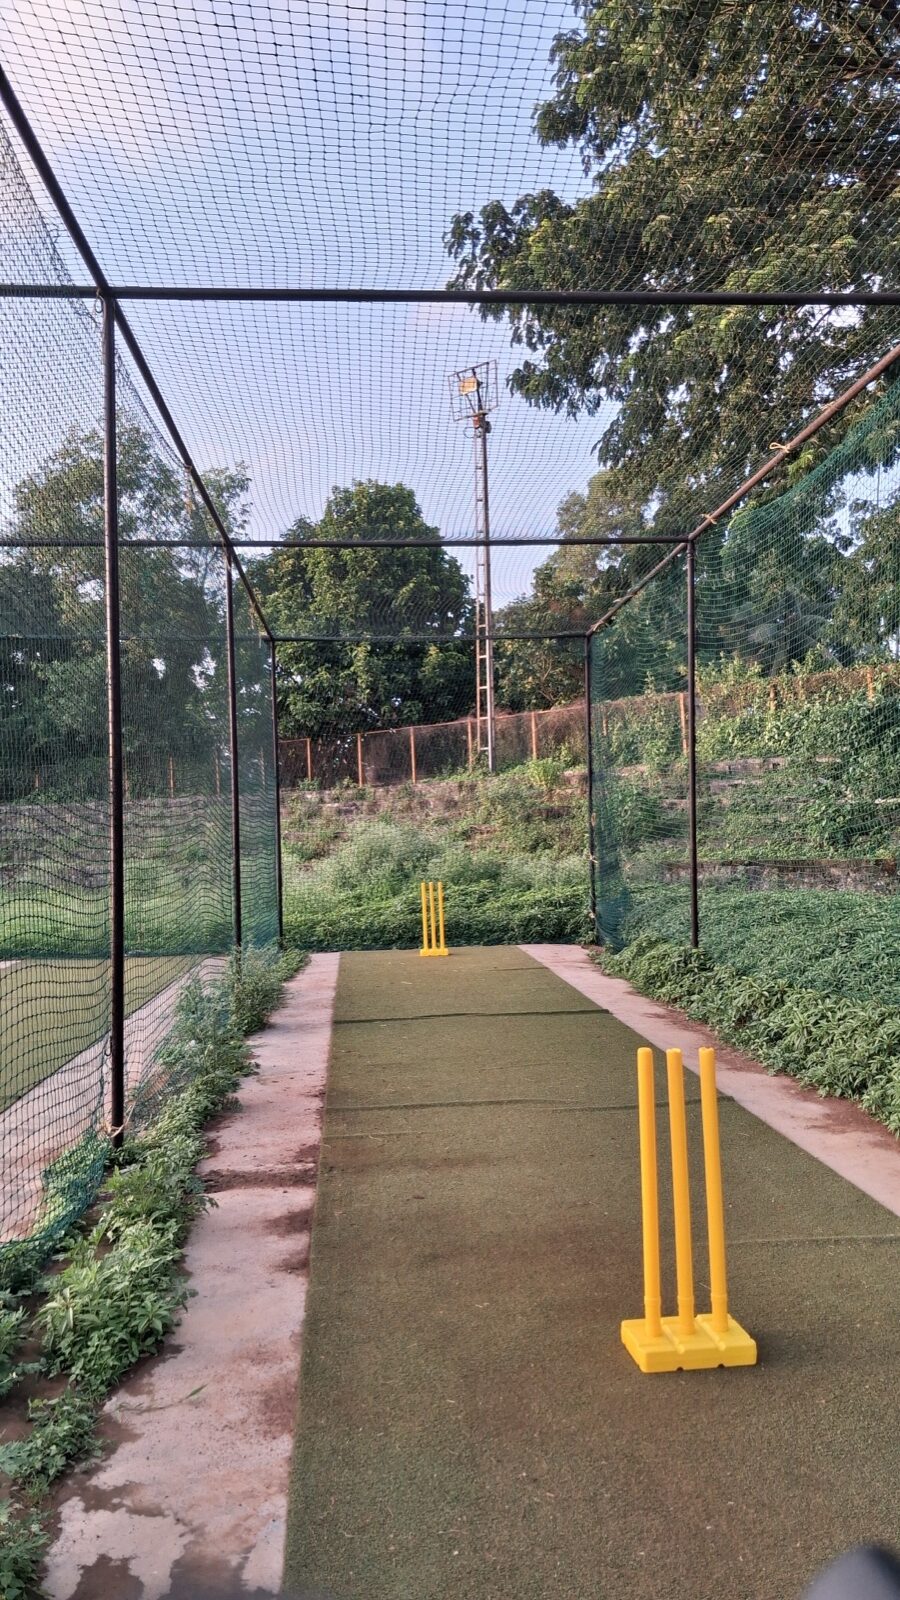
What happens to your video
Section titled “What happens to your video”- Each detected delivery is sliced into a clip.
- Clips are queued and uploaded for analysis. Uploads continue in the background and resume if your connection drops, so you can keep going.
- Your coaches then review the deliveries in the portal.
Save the full session video (optional)
Section titled “Save the full session video (optional)”By default Matcha keeps only the delivery clips. If you also want the whole uncut recording, turn on Save full session video in Settings before you record (iPhone only).
While recording, a small chip shows the status — Full video saving, Full video saved, or Full video unavailable. After the session, open Session Info to find the Full session video card, where you can:
- Play full video — watch the complete recording.
- Export to Photos — save a copy to your camera roll (grant photo access when asked).
- Delete full video — remove it to free up space. Your delivery clips stay saved.
Next: view your analysis & feed.